
アレクサを喋らせるには「スキル」を作成する必要がある。
スキルの作成は意外とハマり箇所が多い。
このエントリでは、アレクサスキルを作成してアレクサ(Amazon Echo)を自由に喋らせる方法を説明する(※)。
※注意: 第1世代Echo Dot発売時点の情報なので注意
アレクサスキルを作り始める前に、スキルがどんな仕組みで動いているのか説明する。
Echoに話しかけると発話情報はアレクサに送られ、アレクサからイベント情報がAWS Lambdaに送られる。
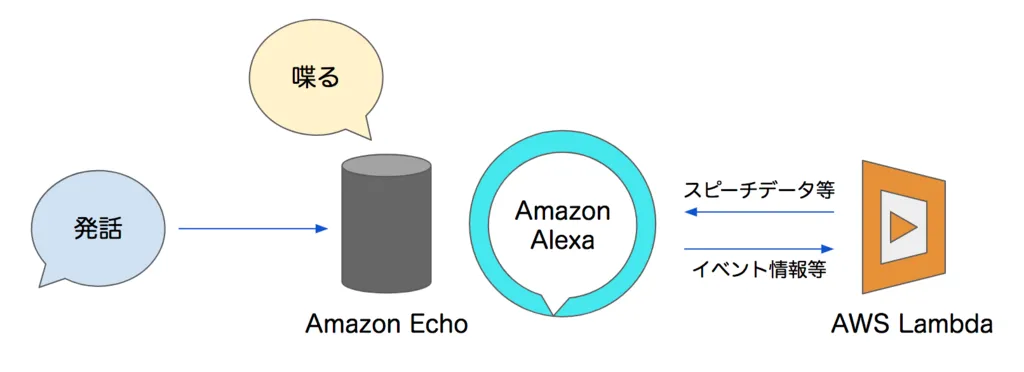
スキルを開発するにあたってやるべきことは大きく分けて次の2つになる。
- Alexa Developer Console で対話モデルを作成する
- Lambda関数を作成しスピーチテキストを返す
対話モデル作成、Lambda関数作成の順に説明する。
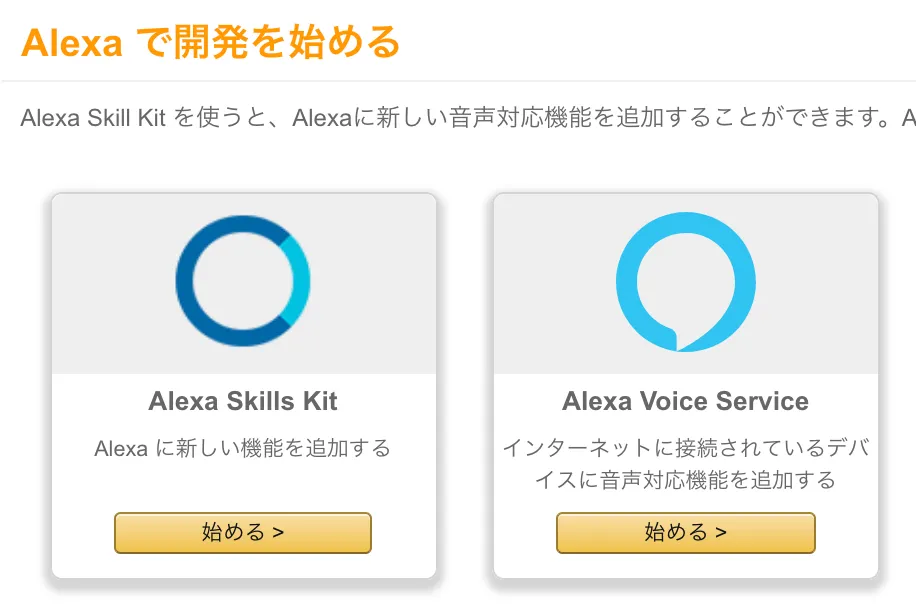
対話モデルというと難しく聞こえるが、Alexa Developer Consoleの指示を順にこなしていくだけでいい。
まずは Alexa Developer Console にログインする。
「Alexa Skills Kit」を選択しスキルの作成を開始しよう。
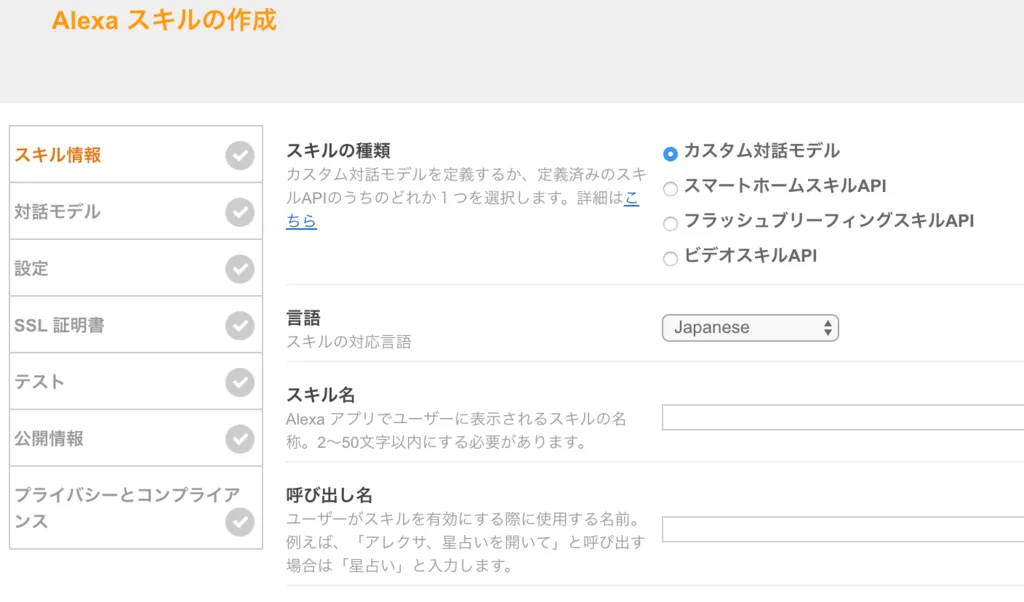
スキルの情報を適当に入力していく。迷う場合は下の表を参考にしてほしい。
入力したら保存して次に進む。
| 項目 | 値 |
|---|---|
| スキルの種類 | カスタム対話モデル |
| 言語 | Japanese |
| スキル名 | おじいさんのキャンディ |
| 呼び出し名 | おじいさんのキャンディー |
対話モデルへ進むと「Skill Builder」が立ち上がるので、左カラム「Intents」横の「ADD+」を選択する。
インテント名を適当に入力して作成しよう。

次にインテントにサンプル発話を登録する。話しかけそうなテキストを適当に入力しておく。
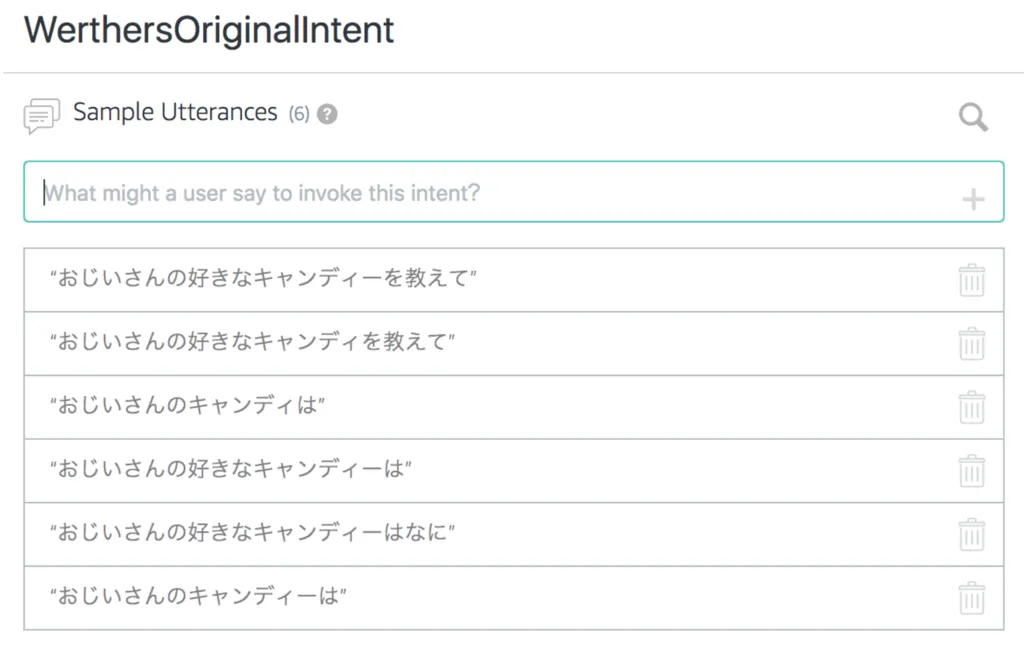
インテントとは、対話モデルに解釈させたいユーザーの意図のことで、ここで解釈された意図が後ほどLambdaに送られる。
インテントにはAlexa Skills Kitのデフォルトで用意されているものもあり、例えば「会話を中断したい」や「使い方が知りたい」といったものがある。
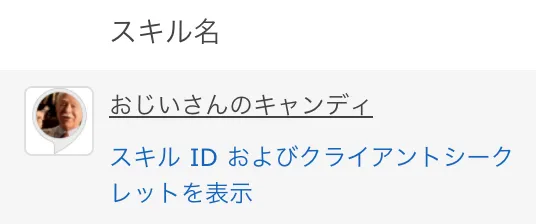
スキルの作成は以上だが、Lambda側に取り掛かる前にスキルIDを確認しておこう。
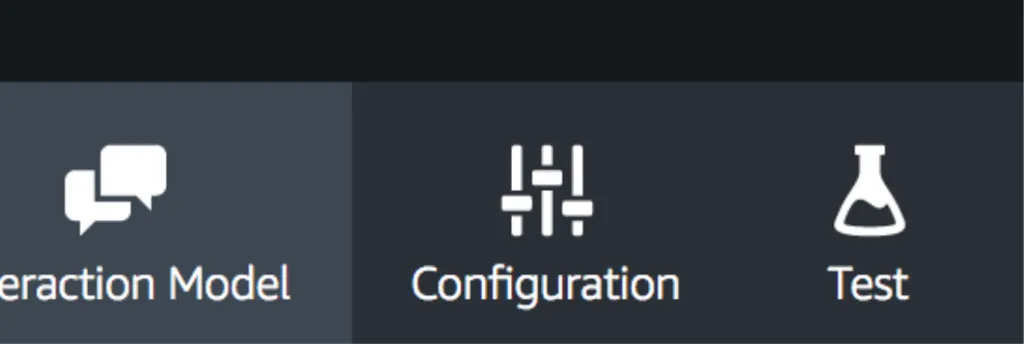
サンプル発話を入力したら、上部ナビゲーションバーの「Configuration」から次に進む。
スキルIDはスキル一覧から確認することができる。
あとで必要になるのでメモしておこう。
amzn1.ask.skill.xxxがスキル ID だ。
次にLamda関数の作成に移るが、この画面は後で使うので閉じずに残しておこう。
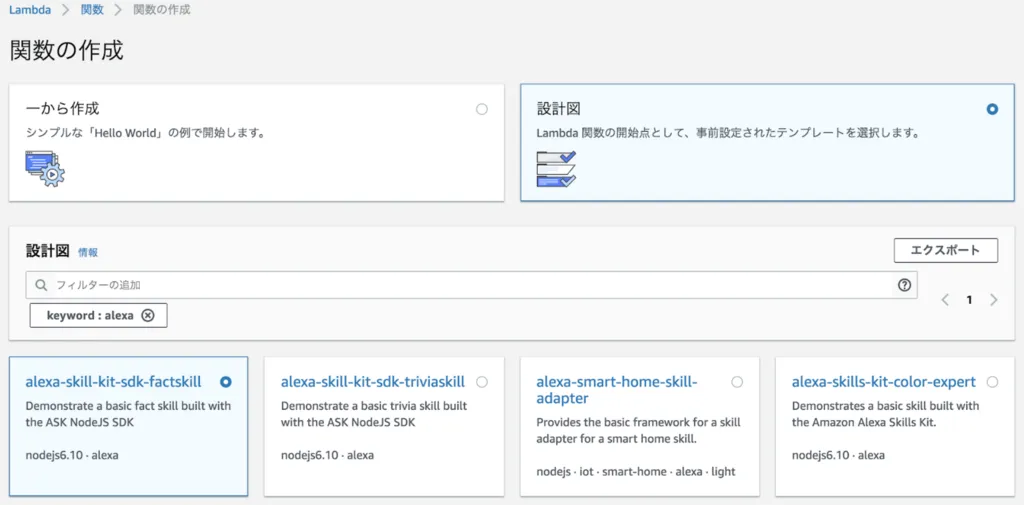
AWSマネジメントコンソール にログインし、Lambda関数を新規作成する。
「設計図」を選び、検索フィルターに "alexa" と入力する。
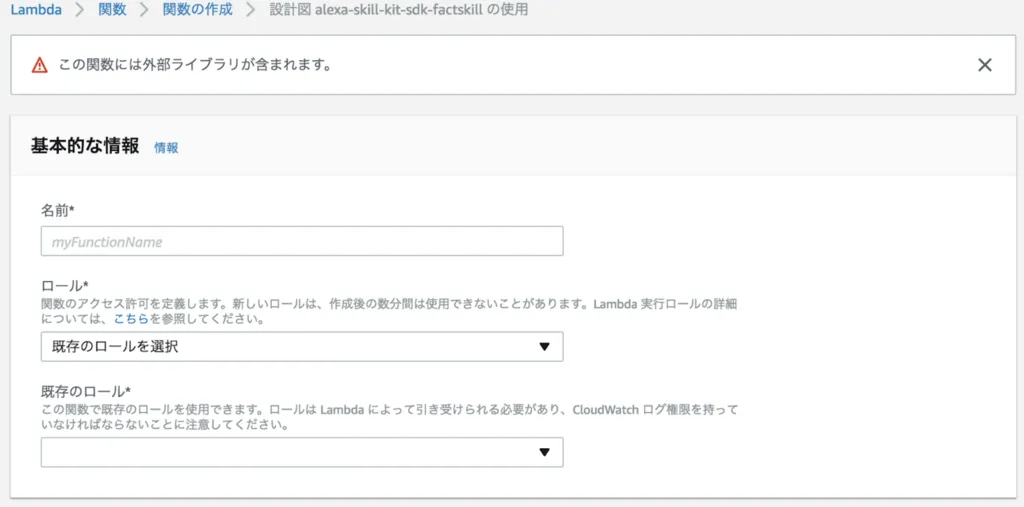
フィルターされた「alexa-skill-kit-sdk-factskill」を選択する。
関数名を適当に入力する。例ではgetWerthersOriginalとしている。
ロールはmyAlexaとしておく。
「左側のリストからトリガーを追加します」を選択する。
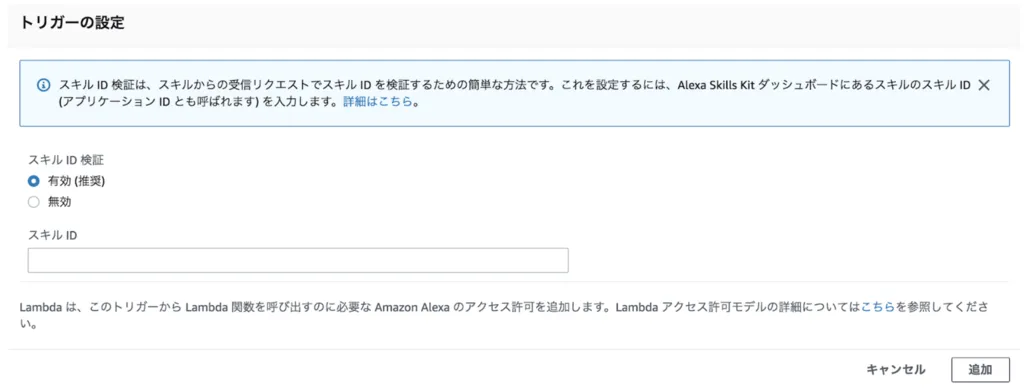
左側にトリガーの一覧が出てくるので「Alexa Skills Kit」を選択する。
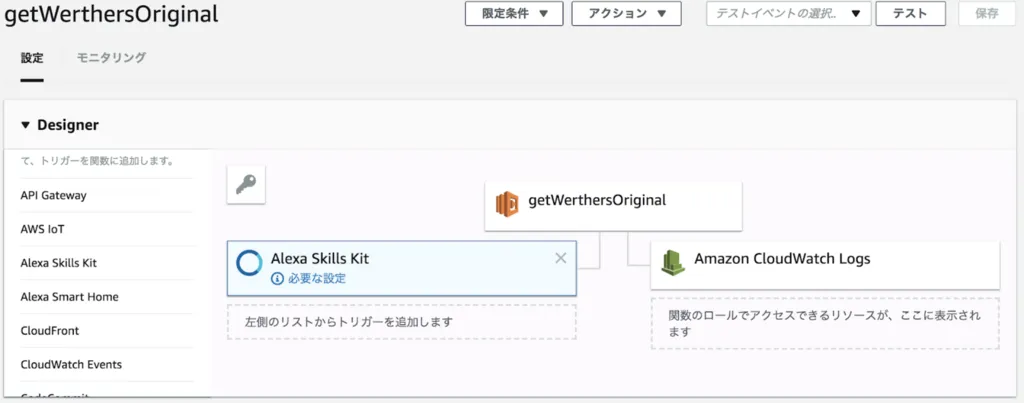
そのまま画面を下にスクロールするとAlexa Skills Kitの設定項目がある。
スキルID欄に先ほど確認したスキルIDを入力して追加しよう。
スクロールして上に戻り、先ほど作成したLambda関数を選択しよう。この例ではgetWerthersOriginalになっている。
Alexa Skills Kitの設定欄がコード編集画面に変わるので、下記のサンプルコードを例にトークスクリプトを入力しよう。
サンプルコード内で変更すべき箇所は以下の通りだ。
-
APP_IDを自分のスキルIDに変更する -
translation内のトークスクリプトを自分なりに入力する -
WerthersOriginalIntentを自分で設定したインテント名に置き換える
'use strict';

const Alexa = require('alexa-sdk');

const APP_ID = 'amzn1.ask.skill.xxx';  // TODO replace with your app ID (OPTIONAL).

const languageStrings = {
    'ja': {
        translation: {
            TALKSCRIPTS: [
                '私のおじいさんがくれた初めてのキャンディ。',
                'それはヴェルタースオリジナルで私は四歳でした。',
                'その味は甘くてクリーミィで、',
                'こんな素晴らしいキャンディをもらえる私は、',
                'きっと特別な存在なのだと感じました。',
                '今では私がおじいさん。',
                '孫にあげるのはもちろんヴェルタースオリジナル。',
                'なぜなら彼もまた、特別な存在だからです。',
            ],
            SKILL_NAME: 'おじいさんのキャンディ',
            HELP_MESSAGE: 'おじいさんのキャンディと言うと、おじいさんのセリフが聞けます。',
            HELP_REPROMPT: 'おじいさんのキャンディを聞きますか',
            STOP_MESSAGE: 'わかりました。',
        },
    },
};

const handlers = {
    'LaunchRequest': function () {
        this.emitWithState('WerthersOriginalIntent');
    },
    'IntentRequest': function () {
        if (this.event.request.intent.name === 'WerthersOriginalIntent') {
            this.emitWithState('WerthersOriginalIntent');
        }
    },
    'WerthersOriginalIntent': function () {
        const talkscripts = this.t('TALKSCRIPTS');

        // Create speech output
        const speechOutput = talkscripts.join('');
        this.emit(':tellWithCard', speechOutput, this.t('SKILL_NAME'), speechOutput);
    },
    'AMAZON.HelpIntent': function () {
        const speechOutput = this.t('HELP_MESSAGE');
        const reprompt = this.t('HELP_MESSAGE');
        this.emit(':ask', speechOutput, reprompt);
    },
    'AMAZON.CancelIntent': function () {
        this.emit(':tell', this.t('STOP_MESSAGE'));
    },
    'AMAZON.StopIntent': function () {
        this.emit(':tell', this.t('STOP_MESSAGE'));
    },
};

exports.handler = function (event, context) {
    const alexa = Alexa.handler(event, context);
    alexa.appId = APP_ID;
    // To enable string internationalization (i18n) features, set a resources object.
    alexa.resources = languageStrings;
    alexa.registerHandlers(handlers);
    alexa.execute();
}; アレクサはユーザの音声を受け取るとLaunchRequestかIntentRequestのどちらかをLambdaに送る。
LaunchRequestは「アレクサ、<スキル名>を開いて」と呼び出したときにトリガーされる。
IntentRequestは対話モデルで定義したインテントに対応する呼び出しを行ったときにトリガーされる。
ちなみに、上のサンプルコードでは大丈夫だがLambdaの初期状態のコードでは下記のようなエラーとなる。
"errorMessage": "Invalid ApplicationId: amzn1.ask.skill.XXXXXXX" これはalexa.APP_ID = APP_ID;の箇所が誤りで、alexa.appId = APP_ID;にすると解決する。
Lambda側の設定は以上となる。
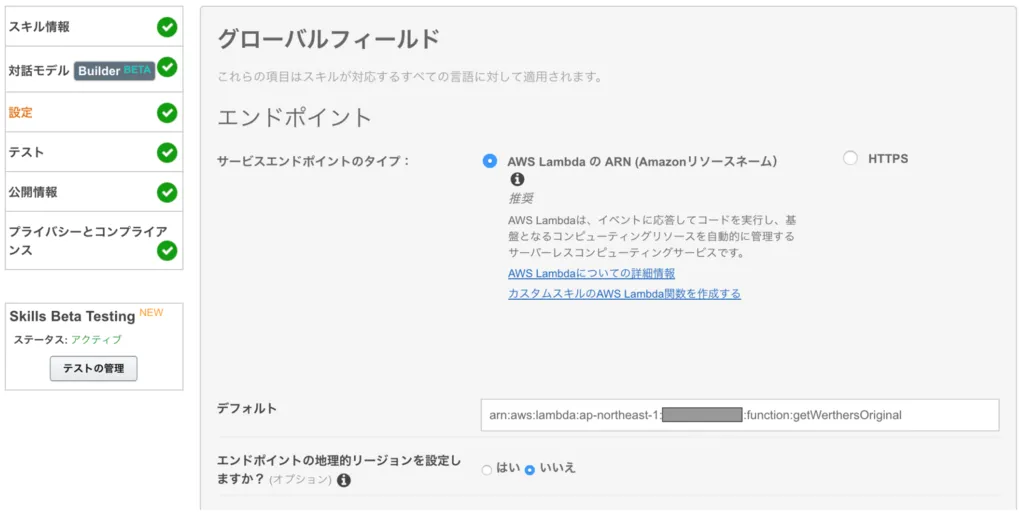
画面右上に表示されている「ARN」をメモしておく。

保存したらAlexa Developer Consoleに戻ろう。
サービスエンドポイントのタイプとして「AWS Lambda の ARN」を選択し、テキストフィールドに先ほどメモした ARN を入力しよう。
テストはスキップし、公開情報は適当に埋めつつ進もう。
途中スキルアイコンの設定がある。
スキルアイコンの画像 (108*108px と 512*512px) を設定する必要がある。
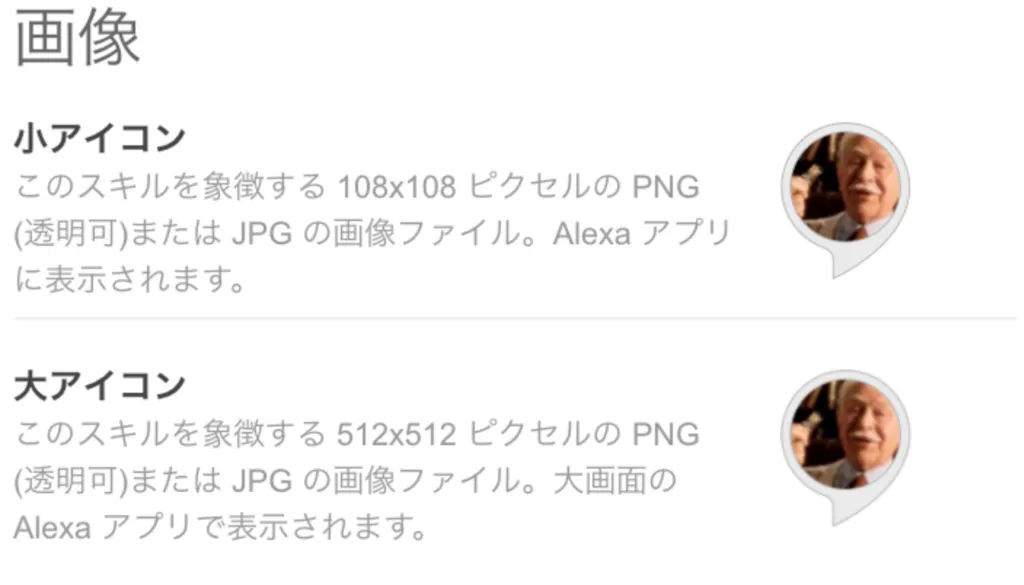
開発バージョンなんだからそのまま使わせてくれよと思うが、あと少しなので頑張ろう。
Mac ユーザの場合、画像サイズの編集には sips コマンドが便利だ。
長方形の画像から 512px 四方の画像を作るには、短辺が 512px になるように拡大・縮小しクロップ (切り抜き) すれば良い。
例えば横長の画像では、短辺となる縦が 512px になるよう拡大・縮小する。
sips --resampleHeight 512 inputfile --out resampled_file512px 四方でクロップする。
sips --cropToHeightWidth 512 512 resampled_file --out cropped_fileいよいよ実機にスキルをインストールして動かしてみよう。
ここまでで全ての手順に ✅マークが付いているはずだ。
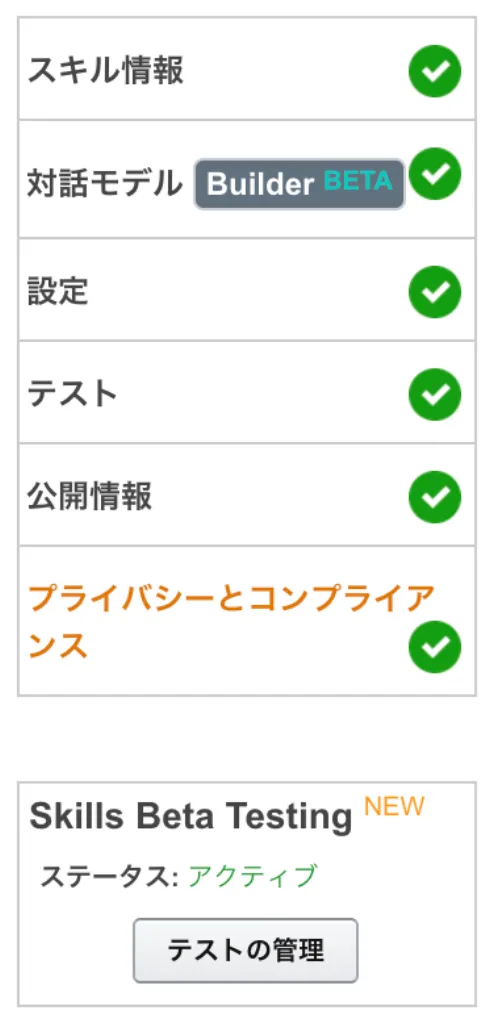
もしまだ ✅が付いていない手順があれば戻って確認しよう。「テスト管理」からβテストができる。
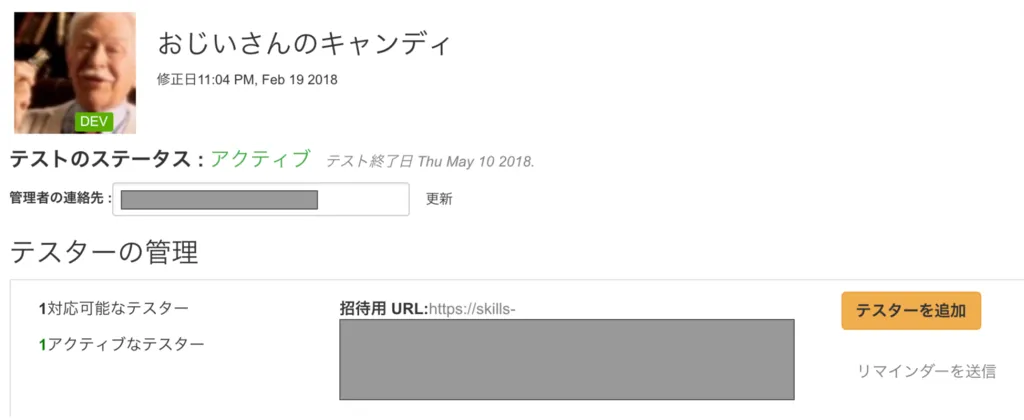
自分のメールアドレスを入力してβテストの招待メールを送ろう。
招待メール内にスキルをインストールするためのリンクがあるので、アレクサと連携した端末で開きスキルを有効化しよう。
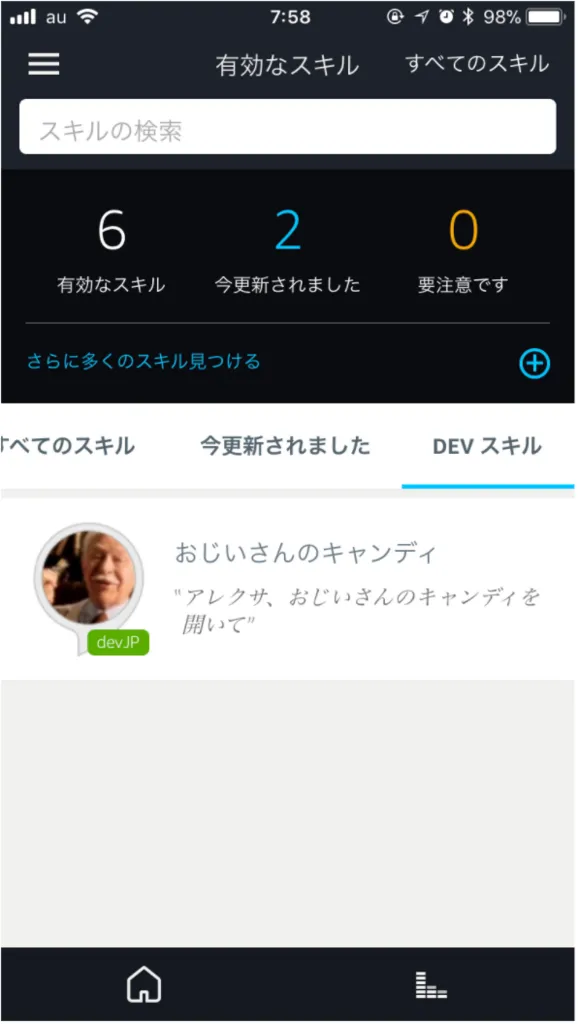
スキルのインストールが完了した画面だ (iPhone)。
「アレクサ、(スキル名)を開いて」と話しかけてみよう。
この例だと「アレクサ、おじいさんのキャンディを開いて」となる。
セリフが始まったら成功だ。
アレクサスキルの作り方は以上だ。
-
IntentRequestによる呼び出しコードを修正しました (2018/2/21)
アレクサに買い物リストを連携する方法を知りたい方は下記の記事が参考になるだろう。
コメントを送る
コメントはブログオーナーのみ閲覧できます